These days it seems like everyone has an Instagram page. Your friends, your parents, your siblings, and we can't forget their side businesses, exercise pages, work profiles, and - well, everything else we can imagine!
With so many Instagram pages vying for our attention, how do you make yours stand out? Especially, if you have a page that is meant to attract attention from people you've never met.
One way you can make your page stands out is by organizing the content into a creative layout. If you'd like to talk about other ways specific to your project, book a 30-min creative consultation - the first one is Free!
Below are a few simple templates that you can begin implementing immediately to ensure your Instagram is polished and visually appealing for future followers.
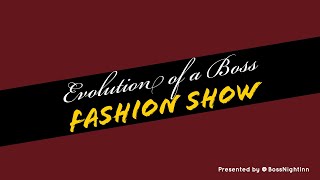
In the templates below, the solid color squares represent photos or heavy imagery. You can use this space to recap a photoshoot or event, showcase a new boutique collection, or even represent seasonal trends or fashions. Have fun with this space and be sure to choose compelling images that will make people stop and double tap. That means adjust the brightness, choose the best or most intriguing angle, add a filter if needed, and a thoughtful caption. For the white blocks with the K Hodge Creative logo, these represent simple content blocks with a solid color. This can be a color block, a quote or phrase, a logo, or in some cases a continuous photo or word block. Of course, white space is always recommended for a clean break among heavy imagery, but any consistent break with simple content will work. A few of the Instagram pages that I have offered creative direction for include @bossnightinn, @melissaashleymusic, @dnbwblog, and @khodgecreative.
Apps You May Need
If you don't already have an Instagram planner, I recommend the Preview App available on both Apple and Android app market. There are a few others that you can try as well including Later and Planoly.
Also, if you don't have an app that can break an image into equally sized blocks for Instagram, I recommend the Grids app available on Apple's app store.
Horizontal Row
The horizontal row layout is simple to execute. Start by choosing 3 images to post in horizontal rows. If you have more photos from a shoot or event or other moment, layer them into one post or add them to your story. Once you have posted one row, choose a logo, solid color, or another simple yet continuous block to post as a row. Feel free to get creative, it only needs to be consistent. (One page I provided creative consultation to chose a block of rose colored glitter!) Once your row of continuous blocks is posted, you are free to post another row of 3 incredible images. Then repeat as often as needed!

Vertical Row
The vertical row layout is a little more complex. Start by choosing a pair of main images (2) to post on the outside of a horizontal row. Remember, you can layer more photos from the same day beneath the main image in one post or add them to your story. Once you have chosen those 2 photos, choose a center image. This can be one consistent image that will always be your center image or it can be a text block, a solid color, or another simple yet consistent block of content. (I remember helping one client produce an 11/11 project in which she contrasted her past YouTube videos to present day remakes. In the center, we used a consistent template to showcase the name of the song. While the title differed from row to row, the center row was still consistent since we used the same template with a white base. (You can see the 11/11 project on @MelissaAshelyMusic's IG page. Scroll down a bit as that project was dated 1/1/2018.)
Once you have selected the image or template that will be replicated in the center row, you may post your first image. Remember to give it a good caption. Next, post your center row image. After you've posted your center row image, post the second image. Before posting your next row, remember to lead with your main image (not your center photo). In effect, you will post the first image, then your center image, and finally your second image, For the new row, begin again with a new lead image, followed by your templated center image, ending with your second image for that recap. (If this is confusing, make sure to download and use an app planner like Preview, so that you can see it visually.)

Chapter Break
A chapter break is a large block of clean, simple, uncluttered content after two or more rows of heavy imagery. This template allows you more flexibility to tell your story organically, over an even number of rows, while also allowing you to dictate the pace of a new story.
For this template, you only need to make sure your content count is easily divided by 3. This will keep your feed even. That means choosing 3, 6, 9, 12, 15, or more images to recap a day or an event (as long as it's divisible by 3). Once you've posed all of your photos for a section, break it up with 1-3 rows of clean, uncluttered content. This can be a row of text, a row of colored blocks, or something else very simple and clean. @BossNightInn uses this layout constantly.

Checker box
This fun layout keeps your feed clean and fresh while being easy to execute. Simply post your photo and then post a simple logo, text, or color block. Repeat as often as necessary!

Diagonal Zig Zag
This is a funky layout that blends the vertical layout with a unique twist in order to accomplish a fun zig zag layout. While different and compelling to look at, this layout requires some planning to execute. With your Instagram planner (like Preview), load six photos and three simple blocks of logo, text, or color. Determine which way you want your diagonal row to flow and manipulate the blocks until you get the desired effect. Once you get the hang of it, you can have some fun with manipulating which way the rows zig and when they zag. I use this layout on a personal Instagram page I started with my best friends @MySoulmatesTaughtMe.
To achieve the layout in the example below, post two images, then one simple logo, text, or color block. For the next row, post a photo, then a simple block, followed by another photo similar to the vertical layout. For the third row, post the simple block followed by two photo blocks. To cascade it back up, you will repeat the step prior where you posted a photo, followed by a simple block, and ending with a photo. (Continue to repeat this step every other row to continue the zig zag). For the final row, you will repeat what you did in the very first row - post two images and then one simple logo, text, or color block. Repeat as needed to achieve the desired effect.

These are just a few of the cool layouts you can do on Instagram if you plan ahead. Want to talk about how we can make your Instagram layout more consistent and appealing? Book your free creative consultation now!
Whether you are creating a brand identity for the first time or you are improving and revamping an existing brand identity, the following questions will help you define your brand.
Define The Brand
The first step of the brand building process is to define the identifying characteristics of your brand.
Name
Choose a strong, memorable name that relates back to your product or service. This name is how people will identify you and your business offerings. It should be somewhat unique, but not too "out of the box" as to cause confusion with customers. Your brand name is your signature. It will go into your website and on collateral. People will tell their families and friends about this name.
Here are a few ideas on how to choose the perfect name:
Begin by creating a list of everything your brand is about - the products and services you will offer, the names of the Founders, the emotions the brand will elicit, adjectives that describe the business. as well as synonyms and other related topics. You can also include competitors for inspiration and to help you differentiate your brand.
Next, highlight your favorite ideas. These are the words and phrases that are closest to the heart of your business.
Now create a new list with various combinations of the words you highlighted. Incorporate synonyms and play off the words and their meanings. Give yourself a few days to brainstorm your final list. You may generate new ideas after a couple of nights of good sleep and a renewed perspective.
Once you have your list, choose your top 3 favorites and research them to see if they are available. Then ask your friends and family what they think of the name. Sometimes, they can hear or interpret something you may not have thought of. After you've researched the names and received feedback, choose a name that you feel fits your brand perfectly.
Here's an example to help you visualize the steps above.
Toya wants to open up a cupcake shop. In brainstorming ideas for her brand name, she lists general related terms such as: Sweet, cupcakes, cakes, bakery, baked goods, delicious, tasty, mouth-watering, red velvet, vanilla, chocolate, pumpkin spice, frosting, sugar, colorful, shop, shoppe, cupcakery, desserts, happy, and warm & fuzzy. Her favorite competitors are named: Nothing Bundt Cakes and Piece of Cake, She also includes her first name in the mix.
Then, she highlights her favorite words and makes a list combining them in different variations. Since her competitors both used "cake" in their names, she decides to stray away from that term. Once she has generated a list of both good and bad ideas, she picks her top 5 favorite, unique names -
Sweet Toya's Sugar Shoppe
My Colorful Frosting
Warm & Tasty Bakery
Toya's Mouth=Watering Desserts
Simply Delicious Bakery
After she researches the names, she decides to scratch off Simply Delicious Bakery because she doesn't want to compete with the Simply Juice brands like Simply Lemonade. Then she runs the rest by her friends, and decides to remove My Colorful Frosting and Toya's Mouth-Watering Desserts because her friends told her they seem like they have subtext in the titles. Finally, she removes Warm & Tasty Bakery since it felt impersonal from what she wants to provide to her customers.
Toya settles on "Sweet Toya's Sugar Shoppe" because it's fun and sweet like she hopes her bakery will be. She also loves that it incorporates her name, making it feel more personal.
After she settles on the name, it's time to decide the look.
Design
All brands are recognized by name and by design. Great brands aim to be recognized by either name or design.
When considering the design of your brand, consider the colors, shapes, fonts, and overall attitude your brand should have. This is a great time to hire a creative partner like me who will help you ensure the design of your brand matches the plan you have for your business. Your creative partner will be able to fully educate you on the nuances of design - how certain colors elicit different feelings, how a font style can be interpreted by future customers, and even how the shape and style of your logo communicates what type of business owner you are.
You can also find out more online. This website has a great breakdown of each element found in your logo. Here's a recap of the strongest points -
Font - The type of text used to communicate your brand's messaging. The font you choose should be used in your logo, website, print collateral, and all other design work for consistency. Here's a break down of the different styles of typography to choose from:
Serif fonts have an anchor or tail at the end of each letter. This type of typography helps your brand appear trustworthy and traditional.
Sans serif is the simple font style without a tail on each letter. These fonts give a more modern, clean feel to your brand.
Script emulates cursive handwriting. It can add a luxurious or elegant feminine feel to your brand.
Display fonts are unique fonts in a league of their own. They display a specialized element, like an unusual shape to the letters, outlines, shadowing, or more artistic/hand-drawn feel. This font type is a contemporary way to differentiate your brand with a signature font.
Color - The color you use in your branding will immediate evoke emotions from your customer. It is important to know what emotions and feelings each color elicits, so that you can be strategic in your branding. Below is a list of colors and the mood they each create:
Red is a bold, defining color of passion and excitement. It's traditional usage makes customers think of love, fire, or bold contrast.
Orange is a high-energy color that can help a brand appear fresh and lively or friendly and playful. It is less intense than red with a sunny disposition.
Yellow. like the sun, is a bright color that elicits happiness. It's vibrant and youthful and is joyfully received like a burst of energy.
Green typically makes people think of two things: money or nature. If your brand is about saving money or saving trees, green is a trusted brand color to incorporate.
Blue, like the sky or the ocean, is the most universally appealing color in the spectrum, Blue makes people feel calm and cool as well as somewhat playful, but in a relaxed way. There's also a bright and lively edge to lighter blues and a more mature, refined edge for darker blues.
Purple is the color of royalty and reflects luxury and quality.
Pink is culturally tied to femininity, so it is a great color for brands with a feminine or luxurious identity.
Brown is a natural color that can appear eco-friendly, diverse, or rugged and masculine depending on how it's used.
Black is timeless, modern and sophisticated. There's nothing more classic, bold, and clean as black.
White is clean, sophisticated, and modern. While white may not be a primary color, it is worth considering as part of your brand package as it can help break up heavier colors.
When choosing your brand colors, you will want to decide on a predominant color that will be the distinct color of your brand. Then choose an accent color to use sparingly to enhance your brand. Finally, select a neutral color like black, white, or brown to convey more serious messaging and to balance out the bright or deep tones in the other colors.
Shapes - Believe it or not, the type of shape used in your logo and other branding elements also contribute to a customer's first impression of your brand.
Round shapes, like circles and ovals, are open and inviting. They create the feelings of community, unity and love or acceptance. They are also fluid and fun as they are the only shape without sharp edges.
Straight shapes - like squares, rectangles, and triangles - make people think strength, resilience, and trust. These closed shapes create a feeling of stability and competence. As a result, if this type of shape isn't balanced with something fun, like dynamic colors, they can feel impersonal and fail to connect with customers.
Straight lines can also convey strong ideals. Vertical lines suggest masculinity and strength. Their up-down nature suggests rigor, permanence, and credibility (think for example of a person who is described as being "straight-laced"). Alternatively, horizontal lines suggest tranquility and mellow vibes. They "go with the flow" and help people subconsciously look ahead (like reading left to right).
Once you choose the font style, colors, and shapes that you want to incorporate into your brand look, it's time to partner with a graphic designer to make your logo. You can also use free logo makers like Canva, but they won't be as unique and personalized to your brand. They are a good place to start out and if they are clean and simple designs, they could prove to be timeless.
Toya, from our example earlier, may take the following points away for her brand -
Toya chooses a script font to convey a feminine, fun personality mixed with Sans Serif to communicate clear. simple messages to her customers.
Toya recognizes that colors are both subjective and a defining personality trait in her brand, so she decides on Orange as her main brand color, She likes that Orange is both bright and fun, without being too overwhelming. It's also her favorite color and she can tell it will appeal to children as well as adults. She also chooses Pink to be soft. feminine, and sweet since she included her name in the title. Finally, she chooses blue to offset the two bright feminine colors and to offer a universal appeal to her branding. To keep her branding clean and contemporary, she will use white as much as she can.
Toya considers all of the shape options and decides on round shapes since they are fun and open. She wants to merge it with horizontal lines to help illustrate that her bakery is progressive but mellow.
If Toya were to design her own logo, it might look something like this:

While this logo is not elegantly designed, it is a start.
Where are you in the process of building your brand? If you would like strategic expertise, remember your first Creative Consultation is Free!